Getting Started with VS Code
Introduction
The Halon software runs on Linux (Ubuntu or CentOS/Rocky/RHEL) with Ubuntu 24.04 LTS being the preferred Linux distribution. root permissions and SSH access to the server are required.
Please do NOT work directly with Halon’s live configuration (files in /etc/halon/). Any work being done with the configuration should be done in a working directory and then built and copied for live use.
Getting Microsoft Visual Studio Code with extensions
For working with the configuration files, we recommend using Microsoft Visual Studio Code. It’s free and can be found here:
https://code.visualstudio.com/download
Microsoft Visual Studio Code (VS Code) can work over an SSH connection from your desktop to your remote server, so all data is securely encrypted, and you can edit your files as comfortably as you would edit files on your local machine. After installing the software, you will also want to install four Halon specific extensions, they are:
-
Halon Configuration Packer - A configuration packer for Halon. It also provides a linter for the YAML configuration files.
-
Halon Scripting Language Debugger - A debugger for Halon Scripting Language (HSL) source files.
-
Halon Scripting Language Linter - A linter for Halon Scripting Language (HSL) source files.
-
Halon Scripting Language Syntax - Syntax highlighting for Halon Scripting Language (HSL) source files.
-
Halon Code Companion - Provides powerful machine-learning driven code generation and analysis for Halon script* (HSL) source files. It extends the capabilities of GitHub Copilot and provides a chat interface to ask for code suggestions, explanations, and reviews.
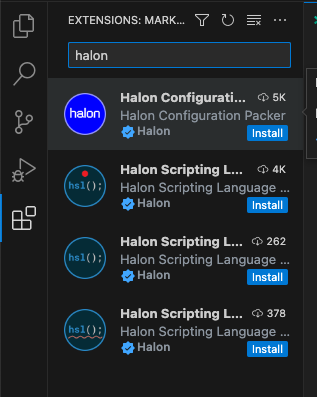
You can easily find and install the extensions by going to the "extensions” menu on the left, then type "halon” into the search bar, like this - then click each of the blue "install” buttons. Look for the blue checkmark next to Halon to verify you are seeing the correct extensions.
Setting up the connection to your server
After VS Code and the extensions are all installed, it’s time to configure VS Code to connect to your server over SSH. (If you haven’t set up a server with SSH yet, please do that now). Microsoft’s instructions for SSH configuration are here, however they have extra steps for connecting to Azure that are not required.
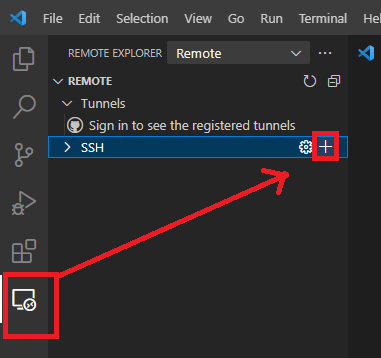
Start by selecting Remote Explorer and then clicking the "New Remote” + sign in the Activity Bar on the left hand side as shown in the image below.
If you don’t see this icon,open your VS Code "command palette” (on Windows type ctrl+shift+p; on Mac, it’s ⌘+shift+p), and type ssh. You should see an option like this:

Choose "Add New SSH Host …”, then type in the SSH command you use to connect to your server in the drop down box:

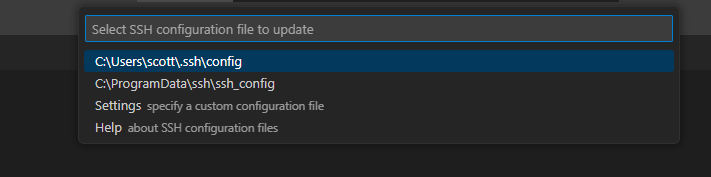
Press enter and then select the file in which this information will be stored for future use:
In the bottom right, you should see this message:

Click "Open Config” and it should look something like this and you can edit this as needed.
Host example.com HostName example.com User root IdentityFile /my/personal/key.pem
Once you save your VS Code configuration (CTRL+S, ⌘+S, or File>Save) you should be able to connect to and remotely view files on the server. The server should now be available in the same place where you started the SSH connection. If it is not, click the refresh icon to the right of "Remote.

Cancel the option to sign into GitHub if presented.

Making the connection to your server
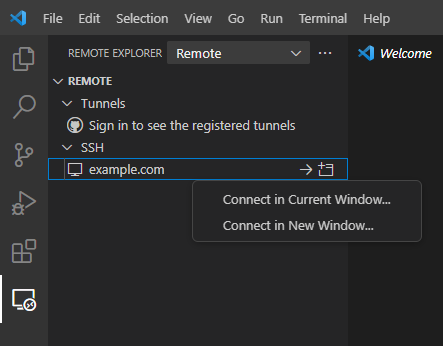
Right click on the server and select "Connect in Current Window”:
Select the server type (note this is the server not your local machine type):

And once connected, you should see this in the bottom left corner:

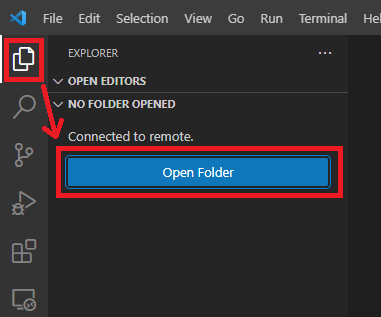
Now we need to open the files on the remote server. In the upper left corner, click the explorer icon, and then "Open Folder”
From here you can open individual directories (i.e. /root/ or /home/user). It is recommended not to open the root directory / as having access to all the files may cause refresh issues or other security problems with editing the wrong files. Multiple directories can be opened at the same time by going back to the ssh explorer and selecting "Connect in New Window”.

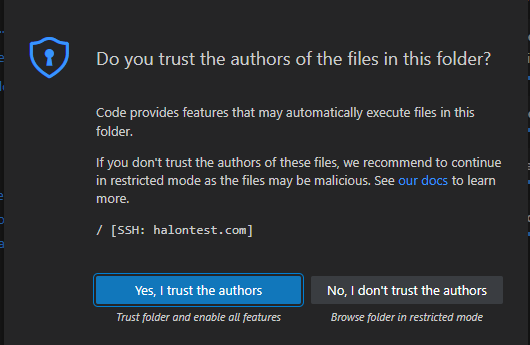
When presented, select "Yes, I trust the authors”:
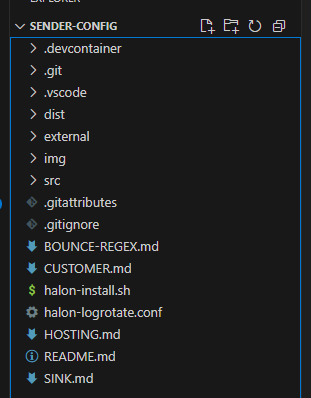
You should now see the selected directory structure on the left side, and you’re ready to start editing.
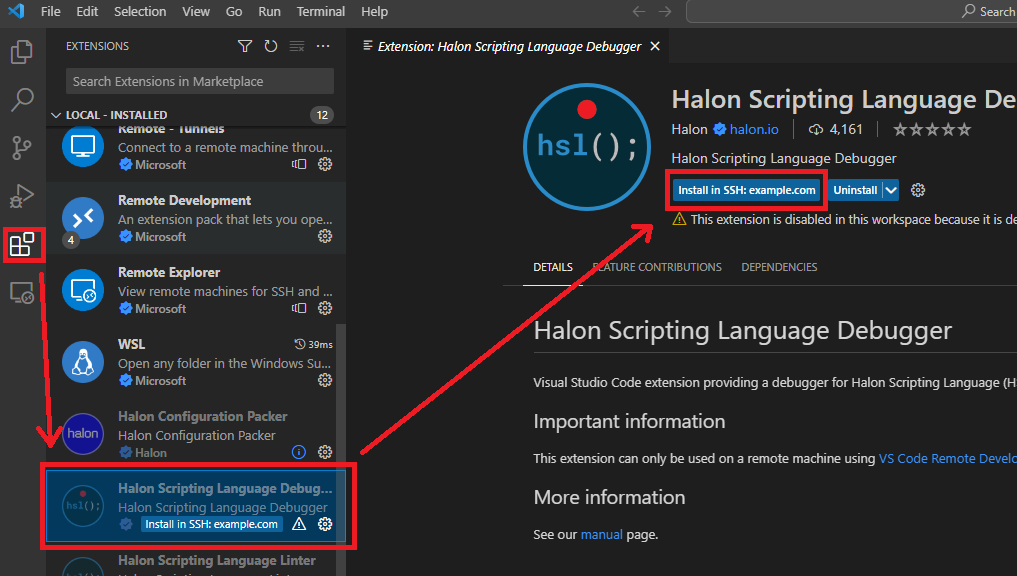
Lastly, you will need to enable the extensions to work with your server. This can be done by clicking on the extension icon on the left, then selecting each Halon extension individually, and finally clicking the "Install in SSH:example.com” option. This is allowing VS Code to activate the powerful editing and debugging features of these extensions for use on your server.
Using the Extensions
Halon Configuration Packer
This extension makes it easy when working with the Halon configuration to build the dist folder based on the src folder. To use it, first open VS Code to the root of your halon folder containing the dist and src folders.
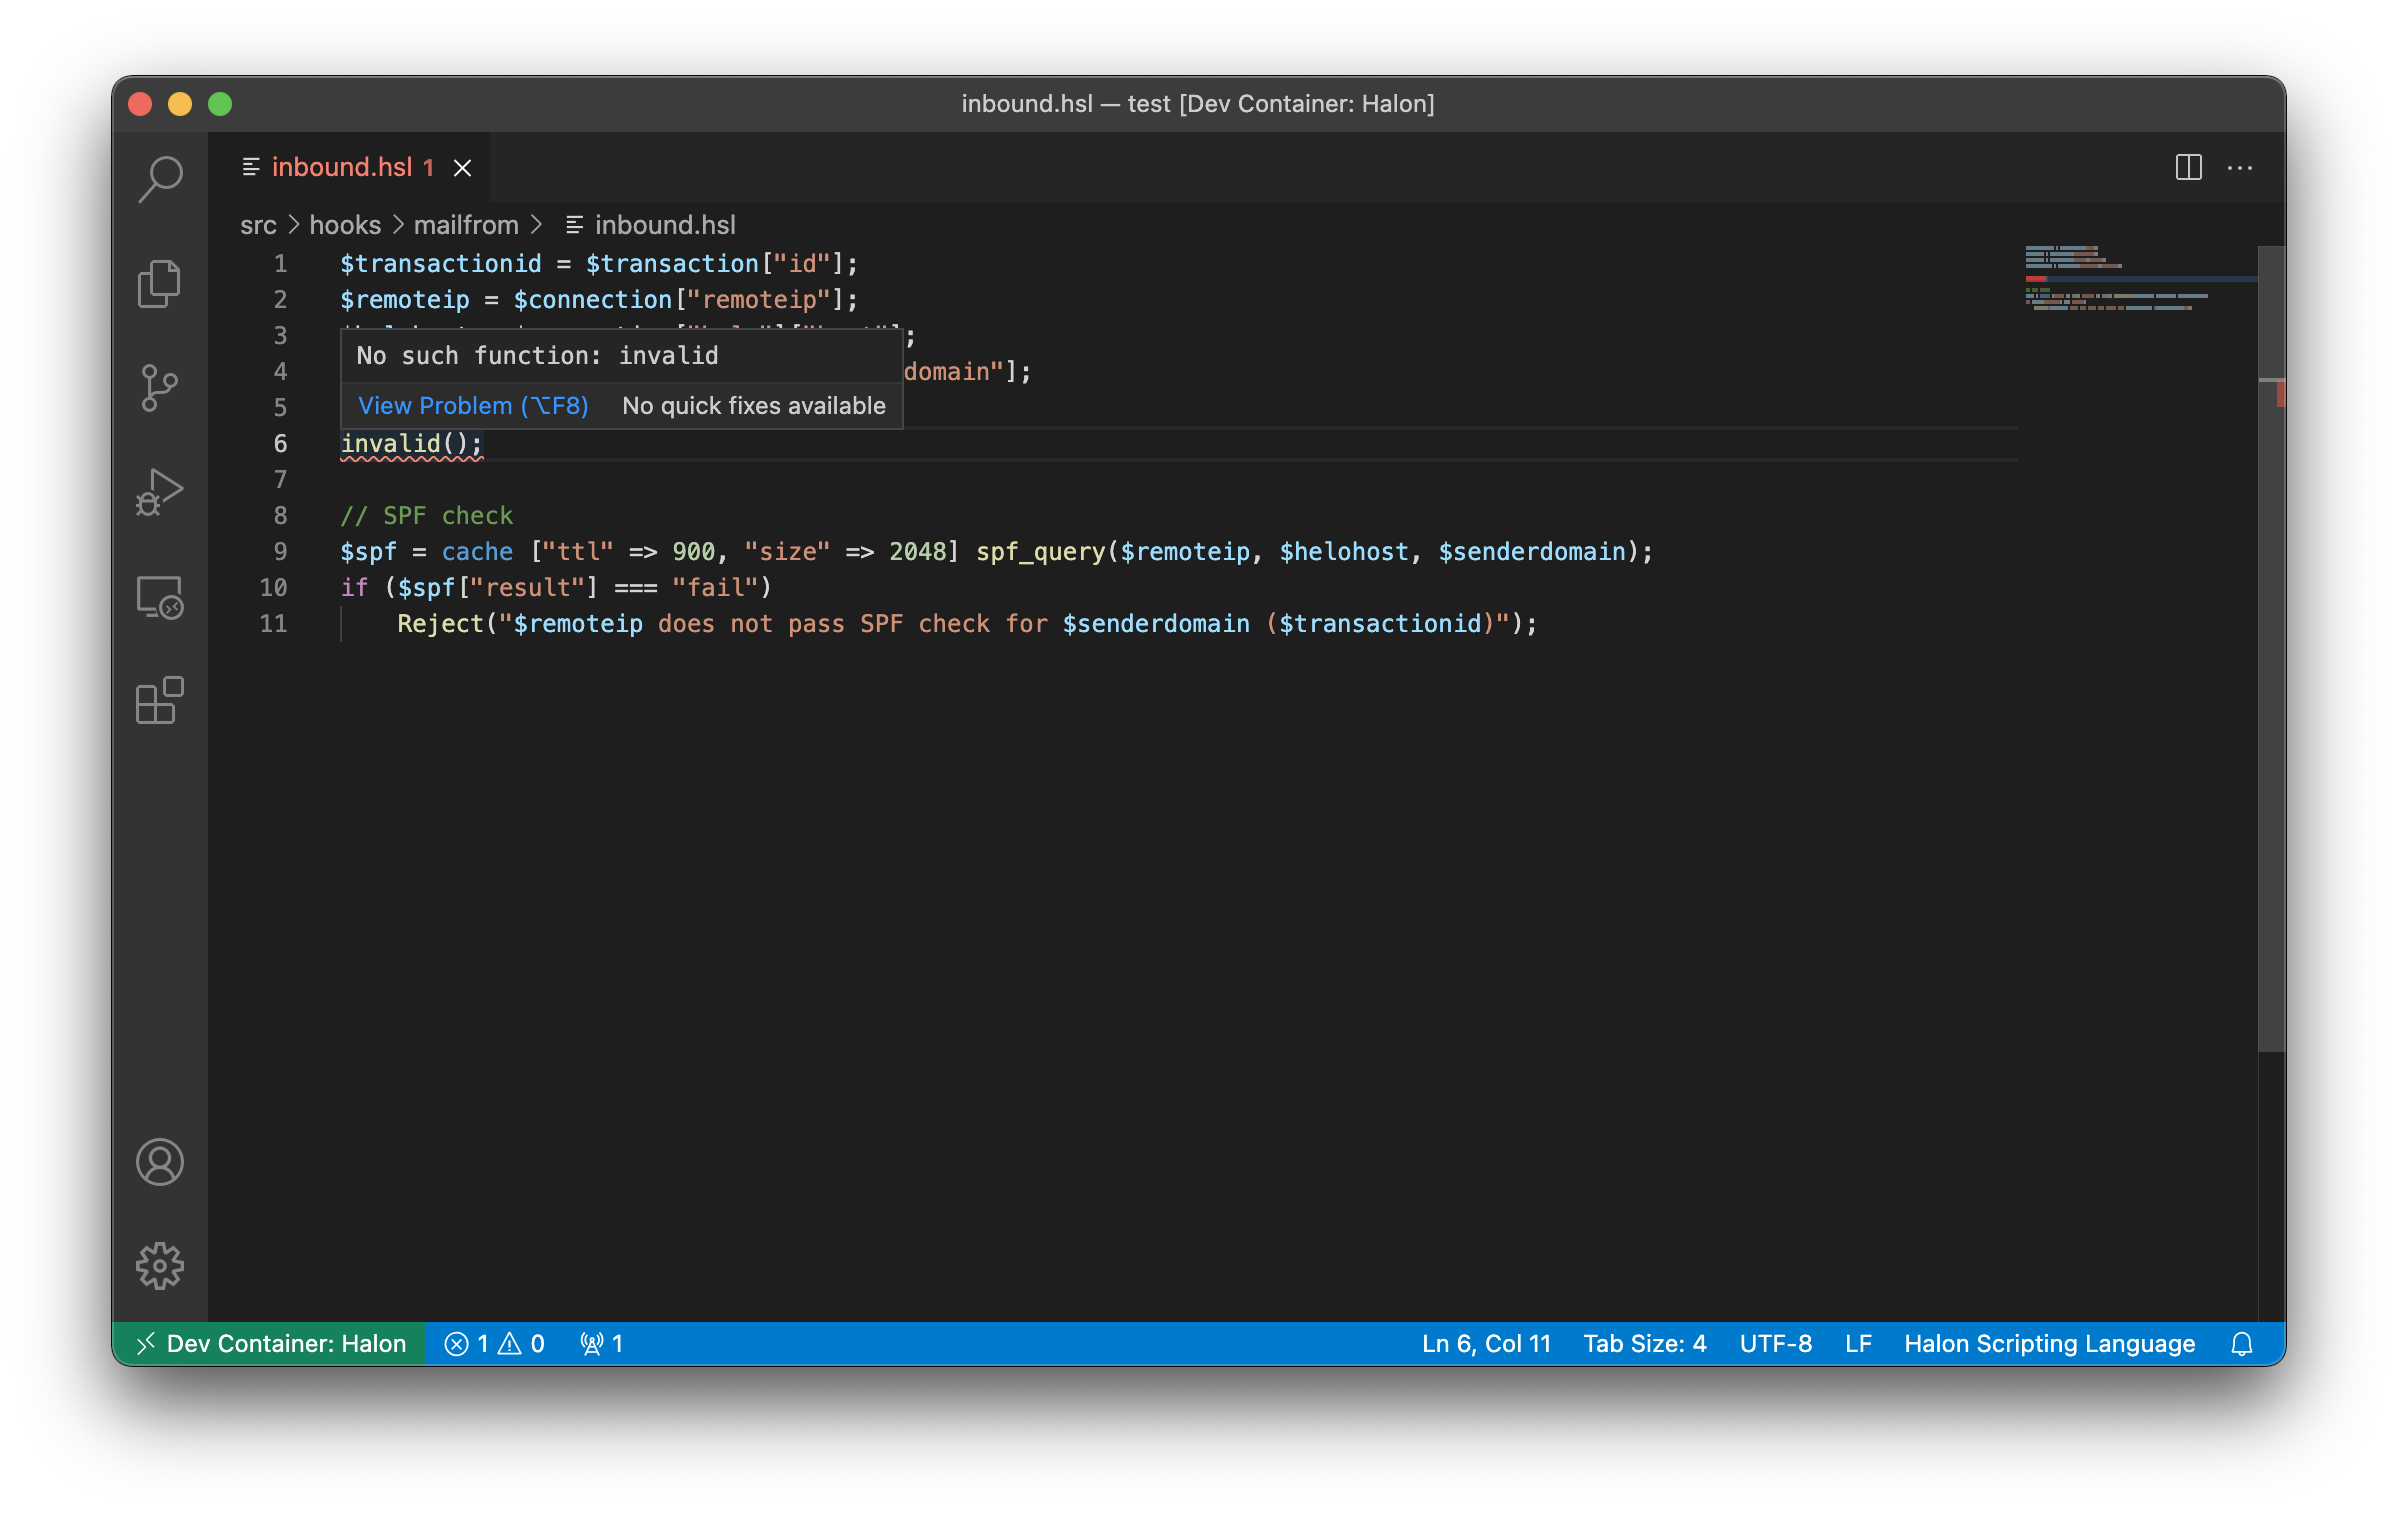
Once you have made all the updates to your src files, open your VS Code "command palette” (on Windows type ctrl+shift+p; on Mac, it’s ⌘+shift+p), and run Halon: Build. This will write the src files into the dist directory in preparation for them to be moved to the /etc/halon/ directory. In the event of an issue in the src directory, an error will be shown in VS Code. For example:

Doing the Halon: Build command is the equivalent running the halonconfig command at the CLI from the same directory.
In the event that no src folder currently exists, the extension also offers the Halon: Init command to build the files for you. Using this option allows for the creation of a minimal Halon configuration that can be used for local, container, or SSH development
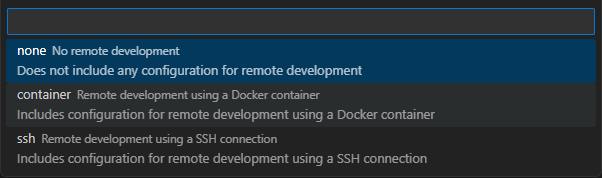
After the development environment is selected from the Halon: Init command, the src folder is ready for use in configuring Halon and the Halon: Build can be used when the src directory is configured as needed.
Halon Scripting Language Debugger
When working with Halon, it helps to be able to debug any code you may be writing. This extension allows for debugging within VS Code.
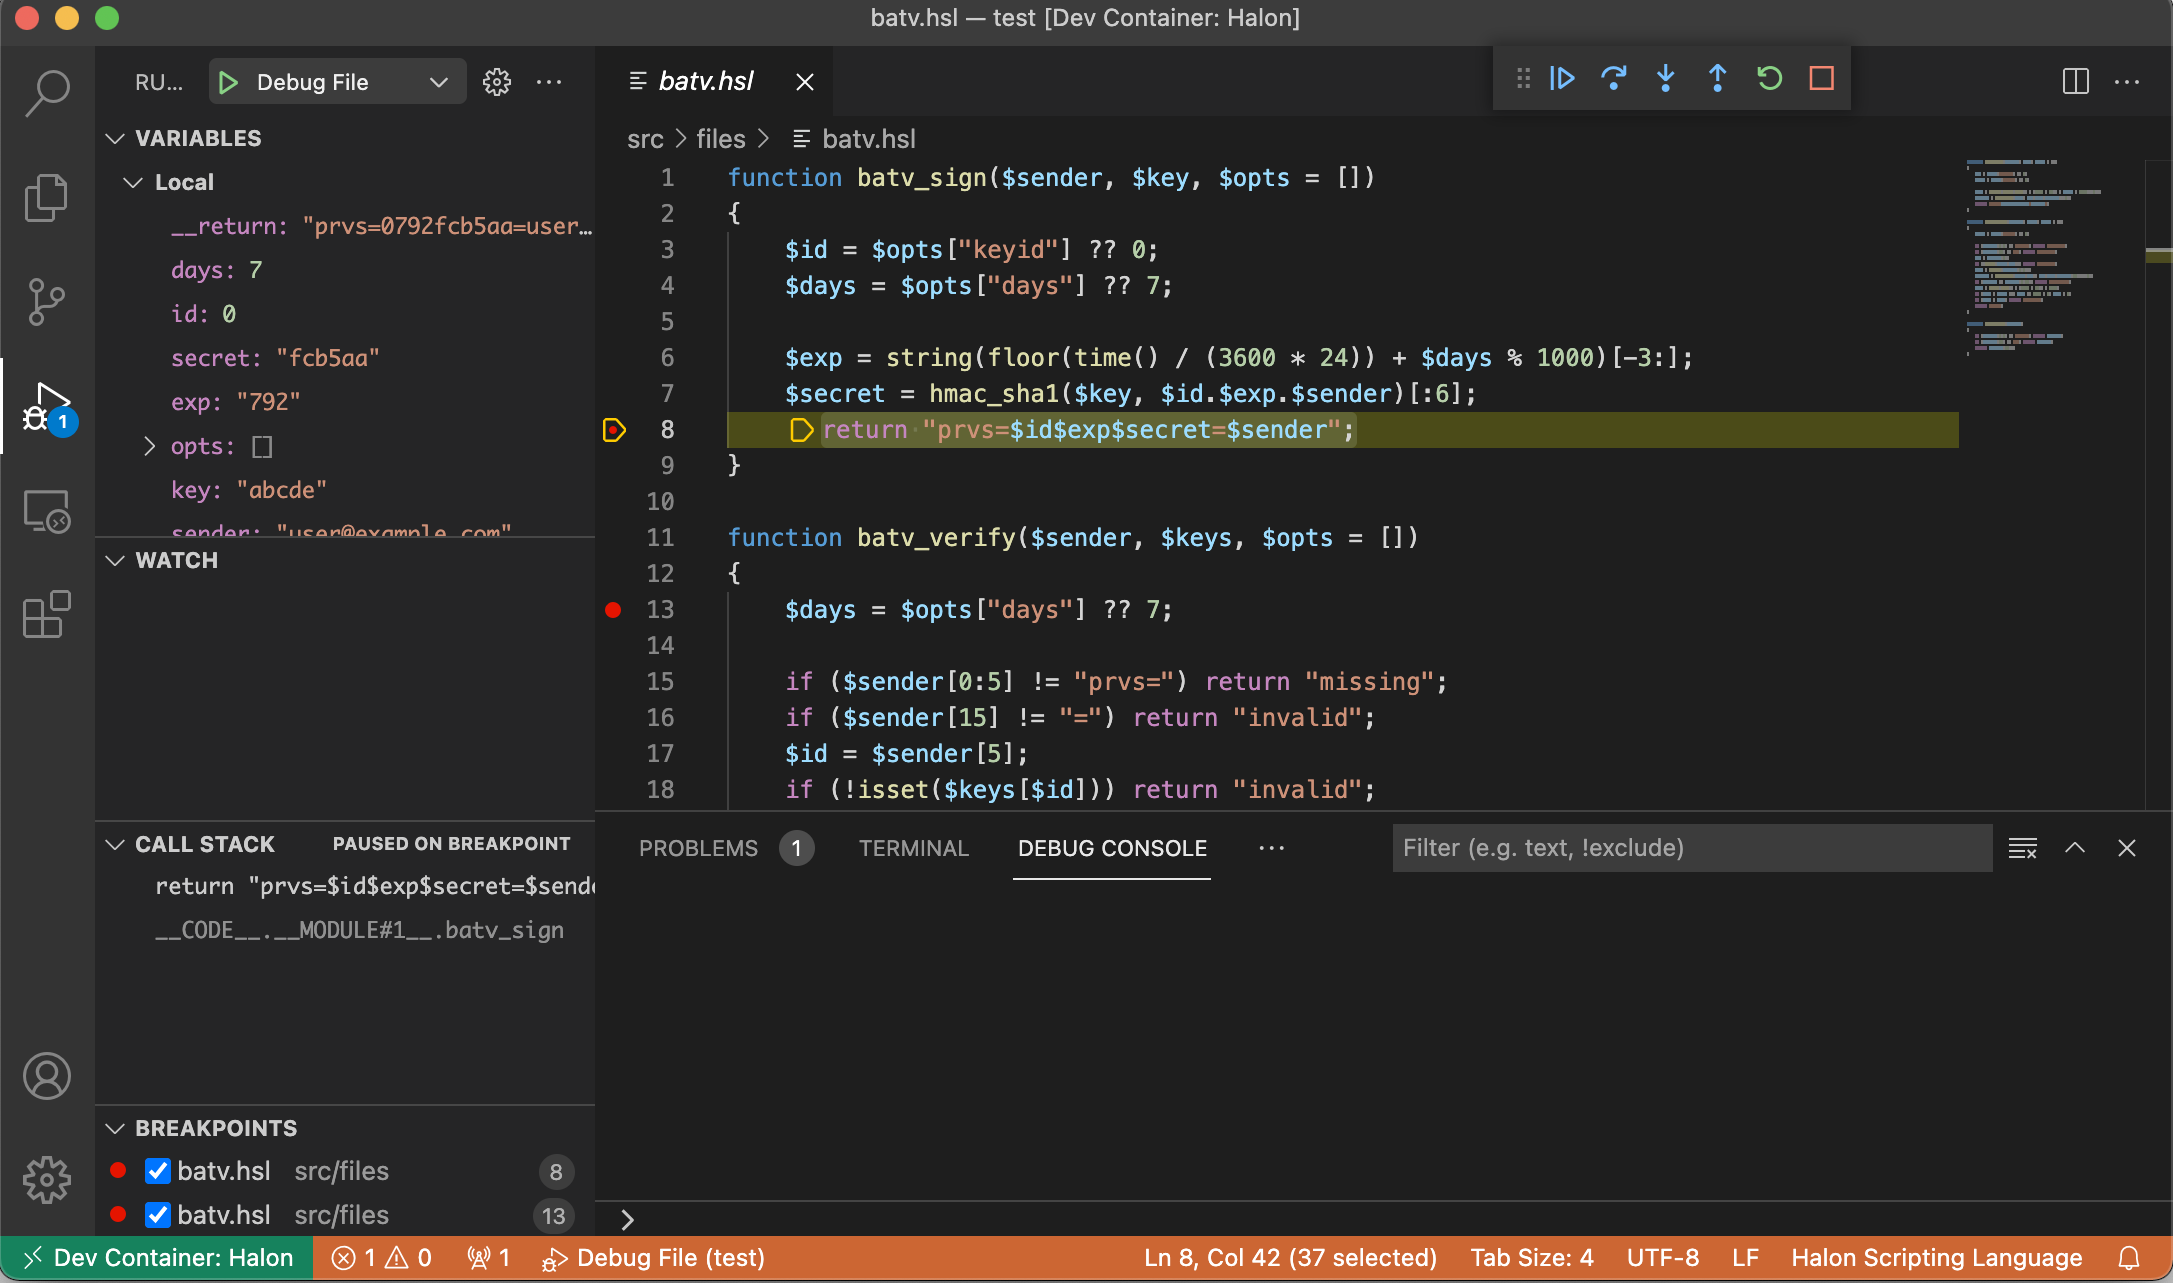
Launch configuration snippets are available under the Halon Scripting Language namespace when the extension has been installed. Use the Debug File snippet if you want to debug a HSL module inside the src/files folder using our script interpreter or the Debug Live Stage snippet if you want to debug the smtpd process when using blue-green testing.
If you open the .vscode/launch.json file that gets created you can add conditions to the Debug Live Stage snippet to limit which incoming connections the test configuration gets applied for, such as probability or remoteips:
{
  "name": "Debug Live Stage",
  "type": "halon",
  "request": "launch",
  "conditions": {
    "probability": 0.01,
    "remoteips": [
      "10.2.55.20"
    ]
  }
}
Halon Scripting Language Linter
Please note, this extension can only be used on a remote machine using VS Code Remote Development and should not be installed on your local machine.
This tool that analyzes code for errors, potential bugs, stylistic inconsistencies, and best practices. In the context of HSL, the linter helps developers maintain clean, readable, and error-free code.
How the Linter Works A linter checks code against a set of predefined rules and provides feedback on:
- Syntax Errors - Detects missing brackets, incorrect indentation, and typos
- Code Style Violations - Ensures consistency with formatting guidelines
- Unused Variables and Functions - Flags variables and functions that are declared but never used
- Performance Issues - Warns about inefficient code practices
- Best Practices - Encourages clean coding habits by flagging poor patterns
Benefits of Using a Linter
- Catches Bugs Early - Helps detect errors before running the code
- Improves Code Quality - Ensures consistent style and formatting
- Increases Productivity - Automates code review processes
Halon Scripting Language Syntax
Writing HSL is like many other languages, as the programmer, you would like the text to be formatted in a manner that makes for easy readability. With the Halon Scripting Language Syntax extension the HSL is formatted to make programming easier.
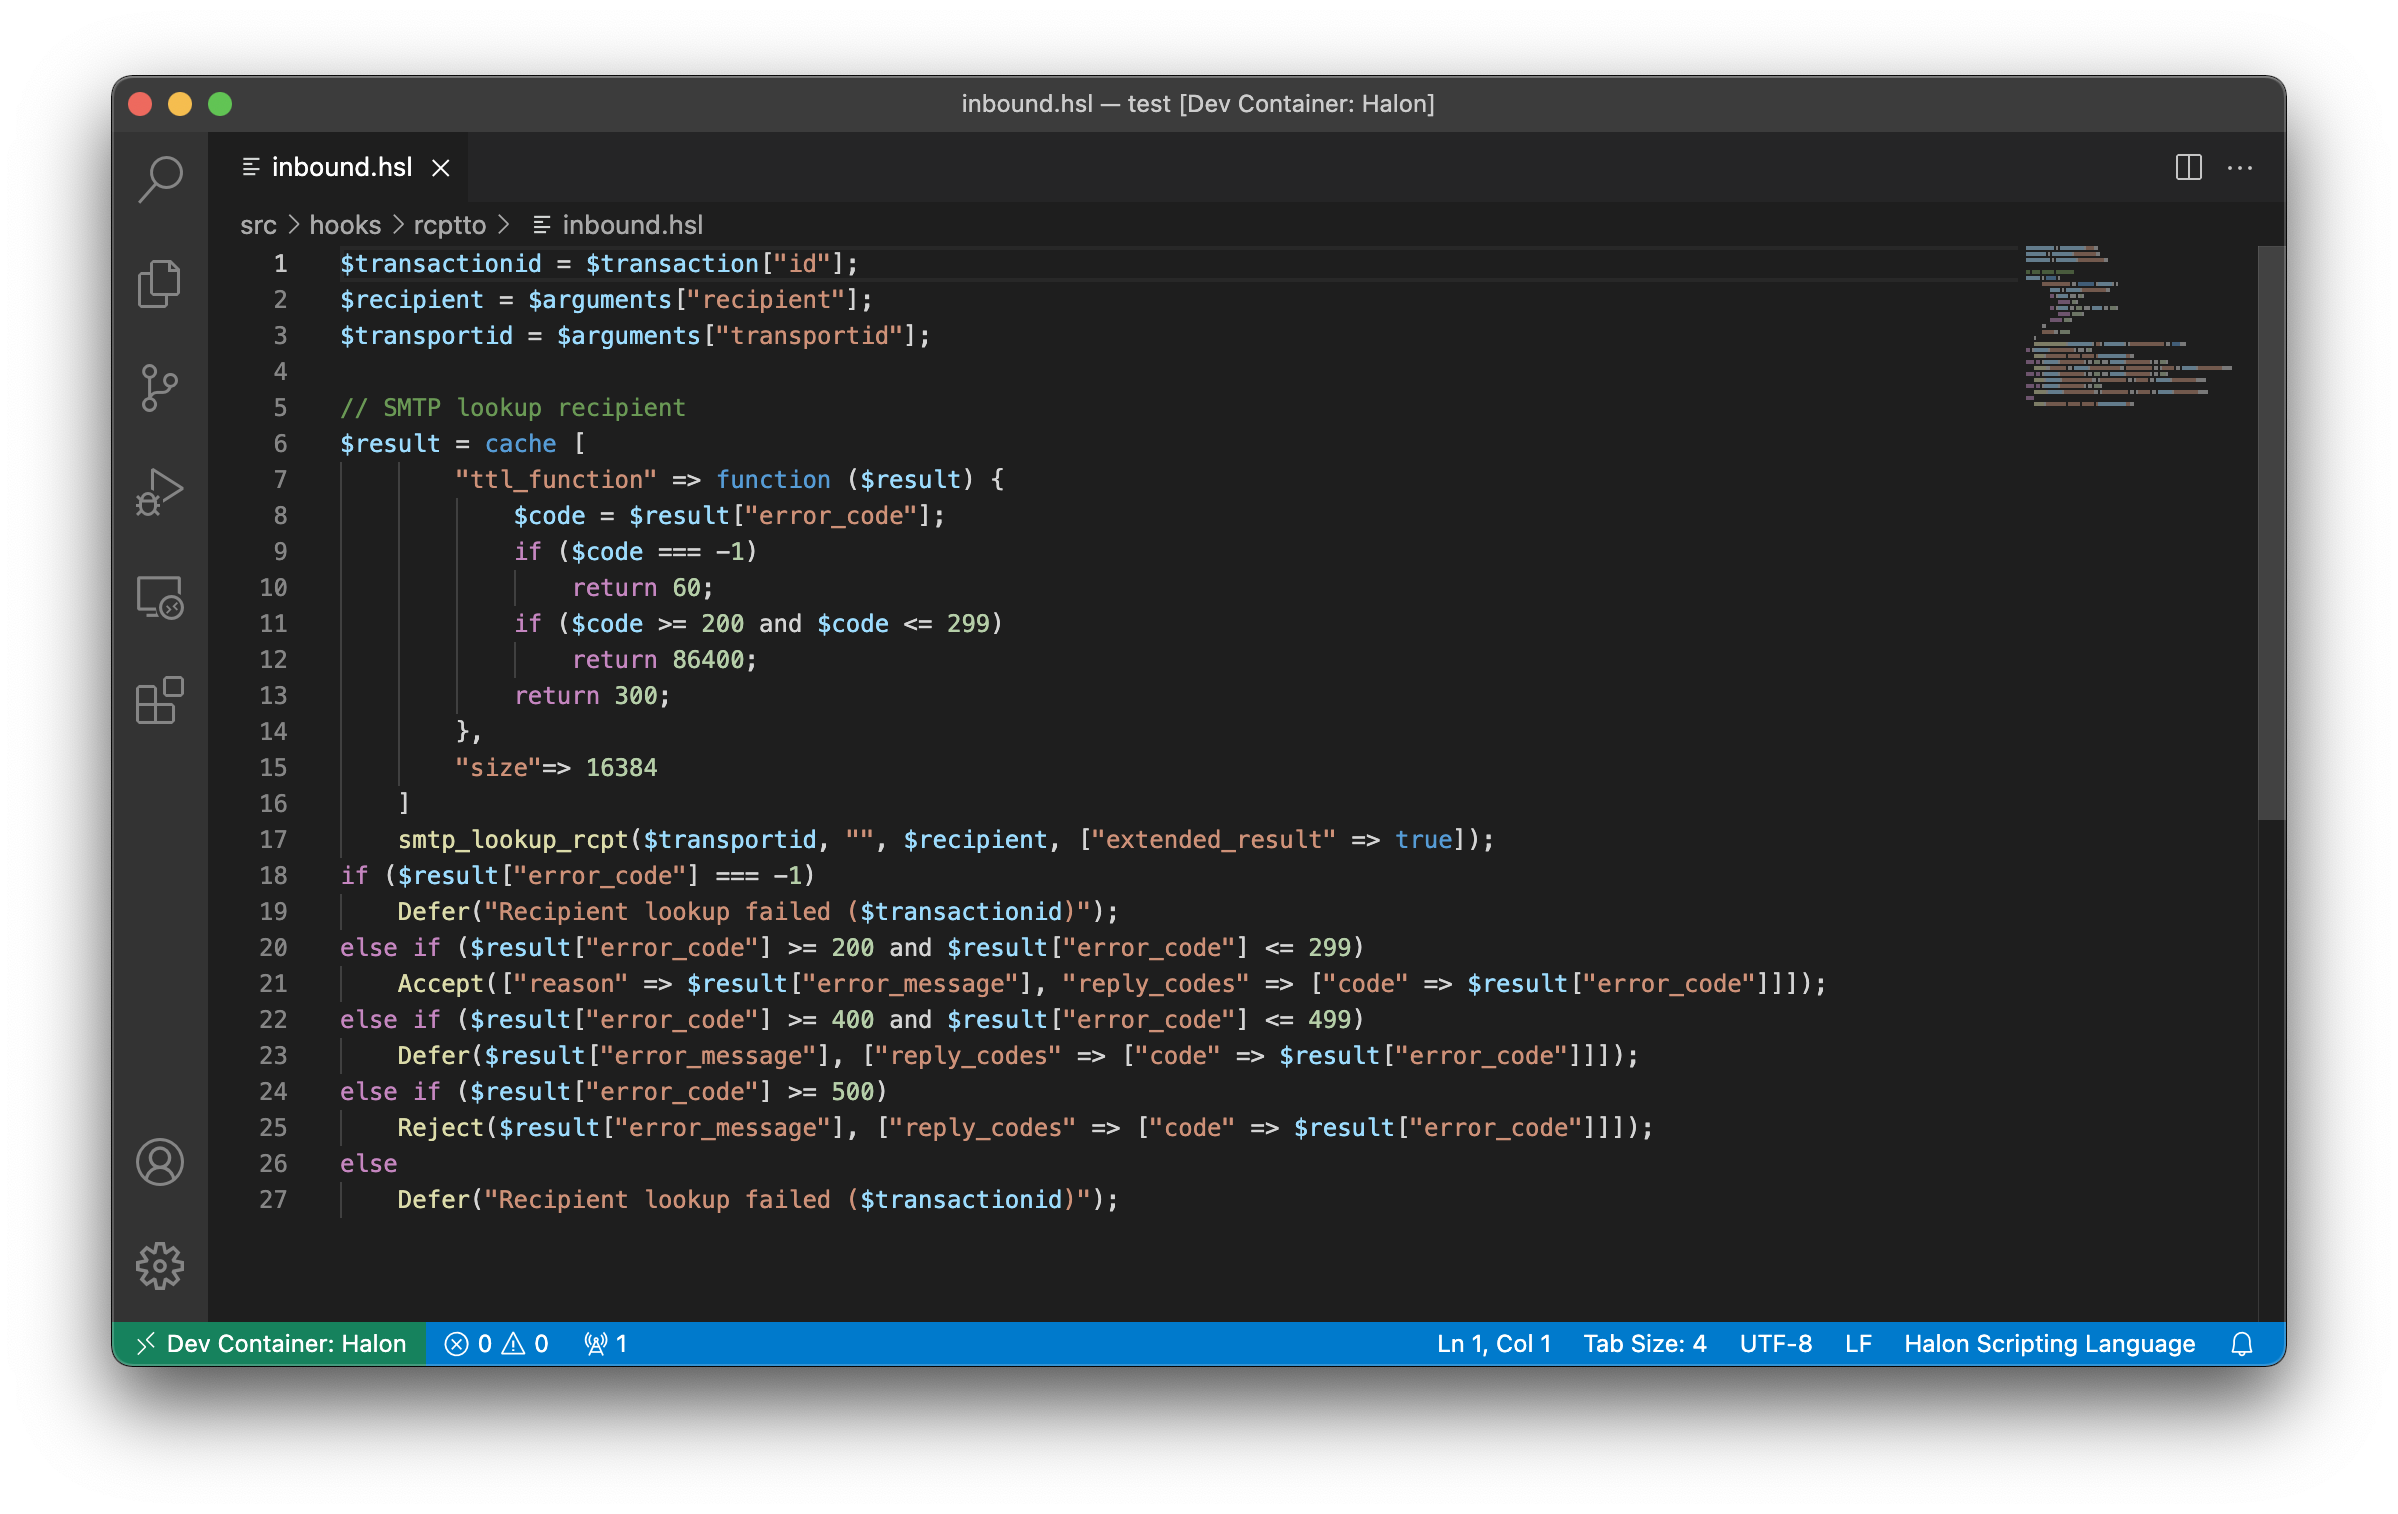
How It Works
- Keywords - Reserved words (e.g., if, else, return, foreach) are highlighted in a distinct color.
- Strings - Text enclosed in quotes ("Hello" or 'World') is colored differently
- Comments - Comments (// This is a comment or /_ Block comment _/) are uniquely colored
- Functions & Methods - Function names have a separate color to stand out
- Variables - Variables are highlighted differently from constants
- Operators - Symbols like
+,-,=, and==have distinct coloring - Numbers - Numeric values have a separate color for easy identification
Benefits of Syntax Highlighting
- Improves Readability: Makes the code structure clearer
- Easier Debugging: Helps spot syntax errors quickly
- Faster Navigation: Developers can quickly locate functions, keywords, and variables
- Reduces Errors: Helps avoid missing brackets, mistyped keywords, etc.
Halon Code Companion
Code Companion provides powerful machine-learning driven code generation and analysis for Halon script* (HSL) source files. It extends the capabilities of GitHub Copilot and provides a chat interface to ask for code suggestions, explanations, and reviews.
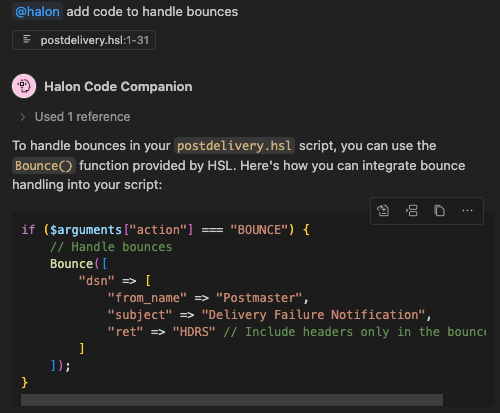
For more information on getting started with Code Companion, see Halon smtpd manual.